Enable billing export to BigQuery
BillSnap reads from GCP's daily billing-export rows in BigQuery. If your project doesn't have an export configured yet, this is how to set it up. About three minutes.
- Open Cloud Billing → Billing export
- Click "Enable standard export" and pick a dataset
- Confirm "Enabled" and copy the dataset name
Total time: ~3 minutes for setup, then ~24 hours before the first row of billing data lands in the table.
roles/billing.admin on the billing account, plus
roles/bigquery.admin (or dataset-creation rights) on the
GCP project where you want the export to live. Project owner is
typically enough for both if it's your own project.
1 Open Cloud Billing → Billing export
Go to console.cloud.google.com/billing, select your billing account in the top-left dropdown, then click Billing export in the left sidebar (under "Cost management"). Make sure the BigQuery export tab is selected at the top.
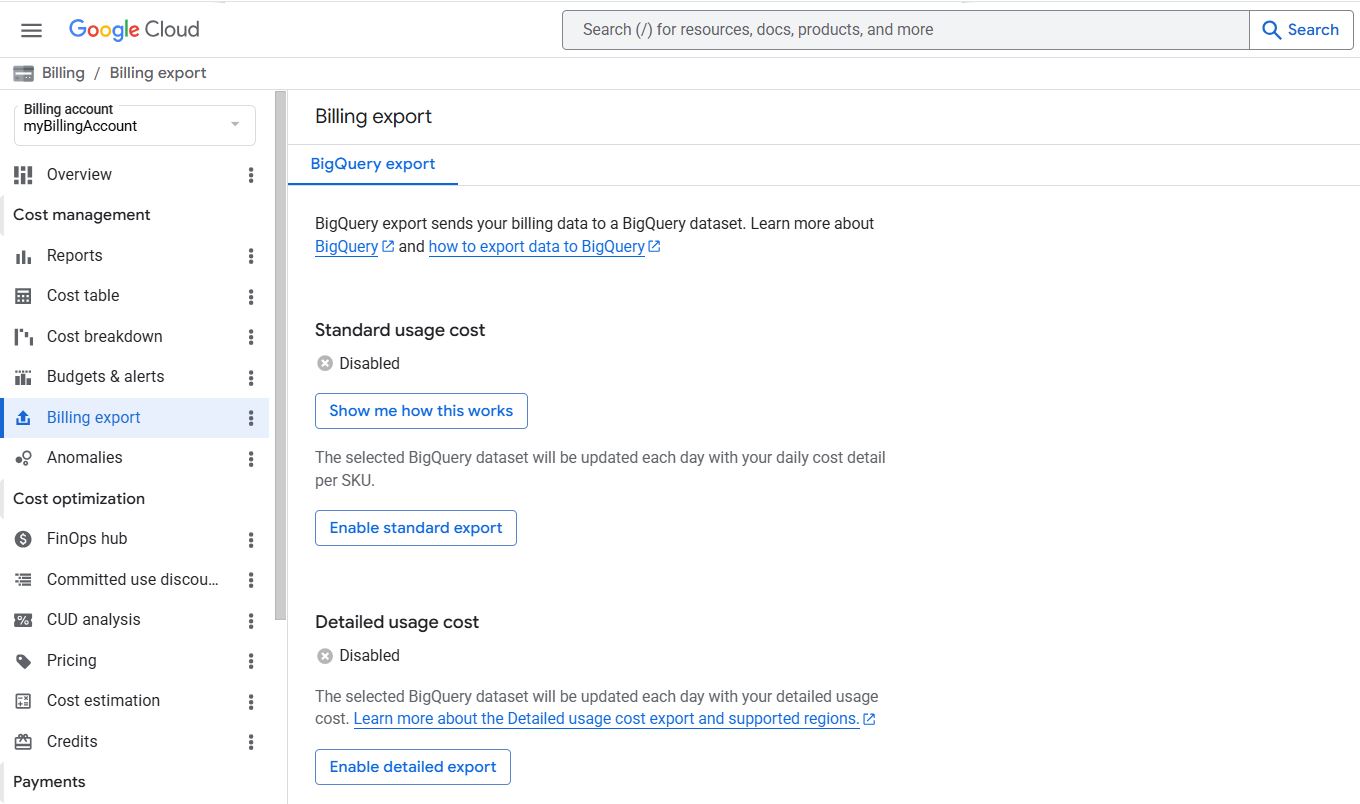
Four exports are listed: Standard usage cost, Detailed usage cost, Pricing, and Committed Use Discounts. Only enable the first one.
2 Click "Enable standard export"
Under Standard usage cost, click the blue Enable standard export button. A dialog appears asking which BigQuery project and dataset should receive the export:
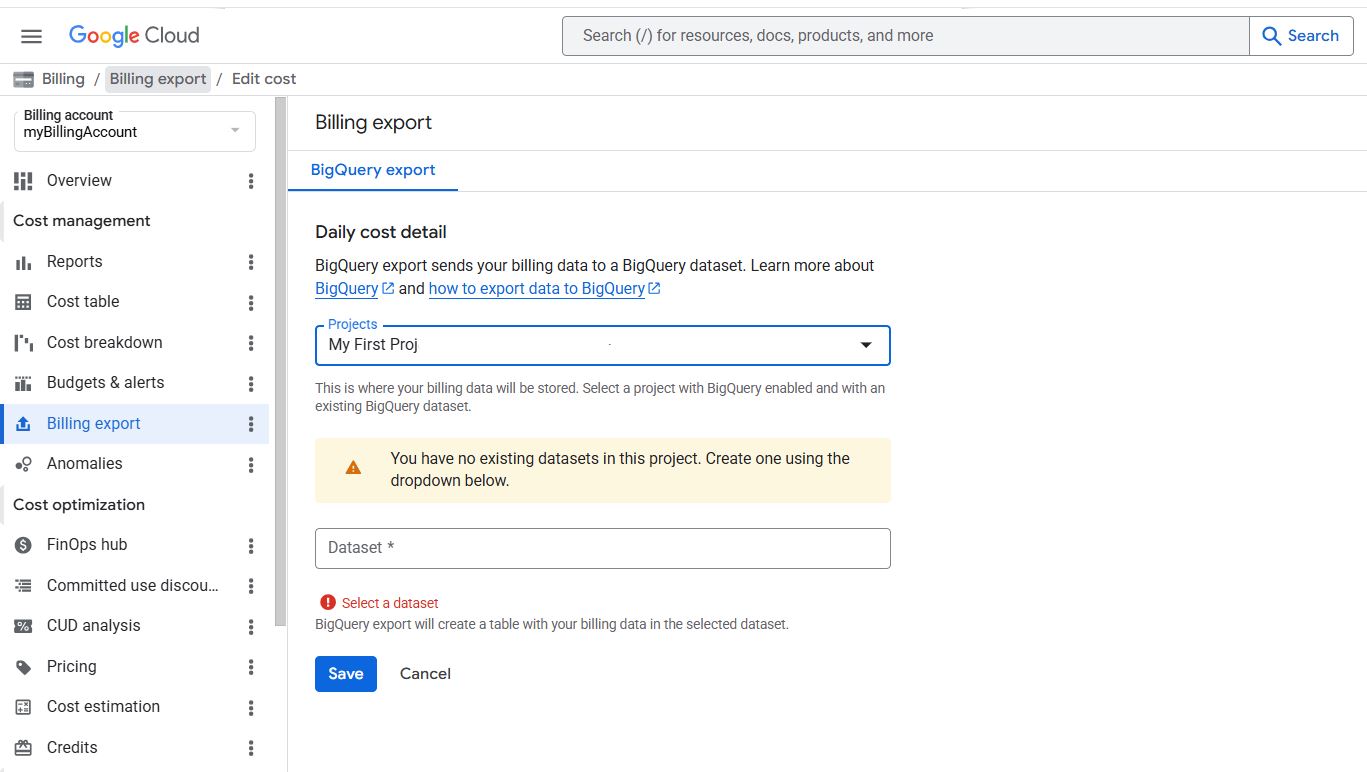
billing_export.Two fields to set:
- Projects. Pick which GCP project will host the BigQuery dataset that receives the export. Single-project setups: your one project. Multi-project orgs: a dedicated "billing" project. The export references costs across all projects under the billing account regardless of which project hosts the table.
- Dataset. Click the dropdown. If you have no
existing datasets in that project, Google shows a yellow warning and
offers "Create new dataset" inline. Name it
billing_export(BillSnap defaults assume this name) orbilling_export_ds— anything works, you'll tell BillSnap the exact name during onboarding.
Click Save.
3 Confirm "Enabled" and copy the dataset name
After saving, you're returned to the Billing export page. The Standard usage cost section now shows ✓ Enabled and the project + dataset name that will receive rows:

Note the Dataset name shown — in this example
billing_export_ds. The export creates a table inside
that dataset within a few minutes; the table name will be
gcp_billing_export_v1_<BILLING_ACCOUNT_ID>. Confirm it
exists via:
bq ls --project_id=<your-project> billing_export_ds

      tableId                          Type    Time Partitioning
 -------------------------------------- ------- -------------------
  gcp_billing_export_v1_0086C9_E94769..  TABLE   DAY
Copy that full table name — you'll paste it into BillSnap's /connect form.
bq ls shows the table but
SELECT COUNT(*) returns zero on day one.
Continue to BillSnap onboarding
Once the table is created (~1 minute after enabling), you can finish connecting your project to BillSnap. You don't need to wait for the first day of data to land — BillSnap will start polling immediately, and the dashboard will show no anomalies for the first ~14 days until the baseline window fills.
Troubleshooting
"Permission denied" when clicking Enable standard export
You need roles/billing.admin on the billing account.
Project owner is not enough — billing-account roles are separate
from project roles. Ask whoever's listed as the billing-account
admin to grant you the role or enable the export themselves.
I have multiple billing accounts — which one do I export?
The one that pays for the GCP project you want to monitor. Open the project's IAM & Admin → Settings page and look at "Billing account"; that's the one to configure.
"You have no existing datasets in this project"
That's the yellow warning shown in step 2 above. Just create one
inline from the dropdown ("Create new dataset"), name it
billing_export or billing_export_ds, pick a
US or EU multi-region, and save. No need to leave the dialog.
The table exists but bq ls shows zero rows
Wait 24 hours. If after 48 hours there are still no rows, return to Billing export in the Cloud Console; the toggle may have reverted (it occasionally happens during org-policy changes).
Can I disable the export later?
Yes — click Disable standard export on the same page. The existing table stays in BigQuery (you can drop it manually if you want), but no new rows are written. BillSnap detection will halt within one daily cycle.